Recipes
Your First Event in 10 Minutes
This recipe walks you through creating a complete, registration-ready event in Forge from scratch. By the end you will have an event with a title, date, location, at least one ticket, and a public registration page live in Salesforce — in about ten minutes.
Before you start
- You have a Forge account with at least Event Manager permissions.
- Your Salesforce org has the Blackthorn Events managed package installed (`conference360__` namespace).
- If you plan to charge for tickets, a Payment Gateway record (`bt_stripe__Payment_Gateway__c`) must already be configured in your org. If you are running a free event, skip the gateway — no payment setup is needed.
Steps
- Open Forge and click **Events** in the left sidebar. Then click the **+ New Event** button in the top-right corner.
- Choose **Ol' Faithful** from the creation options. (Choose **Magic** if you want an AI-assisted draft, or **Clone** if you are copying an existing event.)
- Fill in the basics: **Event Name** (e.g., *Planner Conference 2026*), **Start Date** and **End Date**, and **Location Type**. For an in-person event choose **Venue**; for online choose **Virtual**. Click **Create Event**.
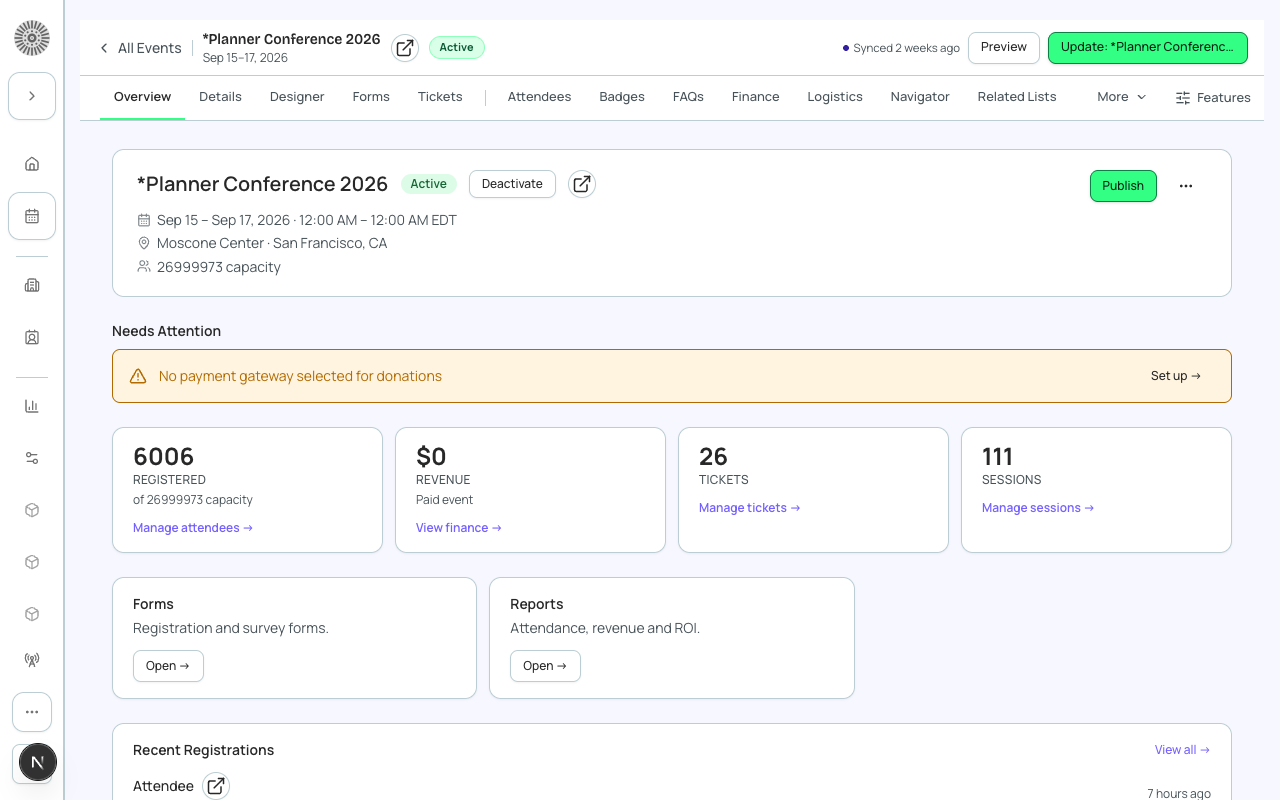
- Forge creates the `conference360__Event__c` record in Salesforce and opens the event workspace. You land on the **Overview** tab.
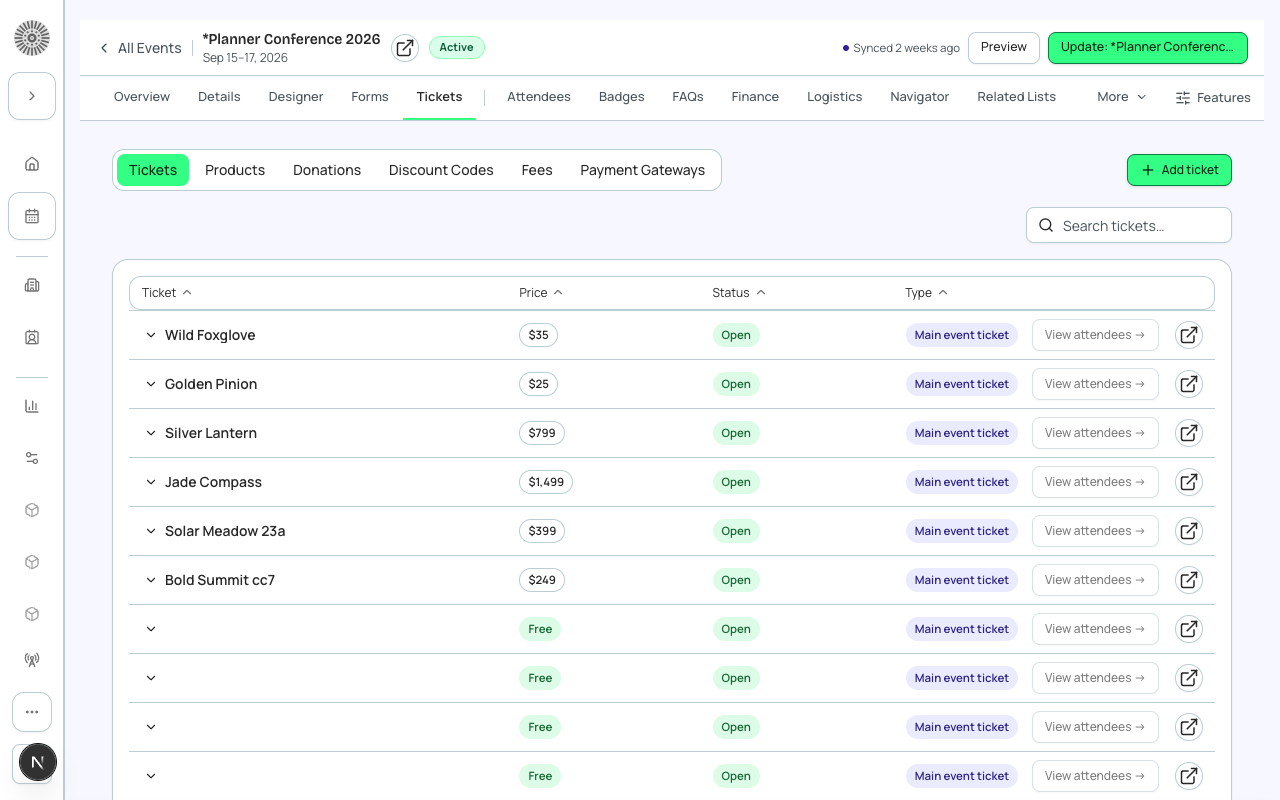
- Click the **Tickets & Items** tab. Click **+ New Item**, set **Type** to *Ticket*, give it a name (e.g., *General Admission*), set **Price** (enter 0 for a free event), and click **Save**. Repeat for additional tiers.
- Click the **Event Info** tab. Review and complete any remaining fields: description, venue address (if Venue type), max attendees, and contact information.
- Click the **Page Designer** tab to preview your public registration page. Optionally update the hero image, accent color, and page sections.
- When ready to open registration, return to the **Overview** tab and confirm **Status** is set to *Active* and **Registration** shows *Open*. The public registration link appears at the top of the Overview tab — share it with your audience.
What this creates in Salesforce
Salesforce Field Mapping
| Forge | SF Object | SF Field |
|---|---|---|
| Event Name | conference360__Event__c | Name |
| Start / End Date | conference360__Event__c | conference360__Event_Start_Date__c / conference360__Event_End_Date__c |
| Location Type | conference360__Event__c | conference360__Location_Type__c |
| Status (Active) | conference360__Event__c | conference360__Status__c |
| Registration Open | conference360__Event__c | Visible__c |
| Ticket Name | conference360__Event_Item__c | Name |
| Ticket Price | conference360__Event_Item__c | conference360__Price__c |
| Ticket Type | conference360__Event_Item__c | conference360__Type__c |
Where to find it in Salesforce
Your new event record is immediately available in Salesforce under the `conference360__Event__c` object. Navigate to the record directly using the Salesforce link icon (the external link icon at the top of the Overview tab). Each ticket you create appears as a related `conference360__Event_Item__c` record.
Verify
- The event appears in your Events list with Status = Active.
- At least one ticket is listed under Tickets & Items with the correct price.
- The public registration link opens a styled registration page in a new browser tab.
- Submitting a test registration creates a `conference360__Attendee__c` record in Salesforce with Status = Registered.
- The attendee count on the Overview tab increments after the test registration.